Mailflow with Microsoft 365 (formerly Office 365)
In order to process incoming and outgoing mails via the appliance, the following conditions are necessary:
- The MX record for the mail domain must point to the REDDOXX appliance (or to the company firewall that is responsible for routing to the appliance).
- The domain must be configured and set up in Exchange Online (for this, it is first necessary that the DNS entries point to O365, then the MX record can be changed to the REDDOXX Appliance).
- SPF records must also include the public IP address of the appliance.
- E-mail addresses of the domain (with mailboxes and licensing) must already be configured.
- A valid SSL certificate must be added in the REDDOXX Appliance and used in the TLS settings for the SMTP Receive Connector
- DKIM must be configured for the domain (note that CNAME entries must be set to create the two selectors).
You can do this e.g. via
nslookup -q=cname selector1._domainkey.YOURDOMAIN.TLDand the result must be a non-authorising response:

Enter the domain(s) in the Appliance Admin web interface => Configuration => Local Domains

Configure the transport rules in the Appliance Admin web interface for each domain so that they point to the corresponding Microsoft 365 MX record. The default policy has to be placed at the last spot in the list.

Specify the corresponding domain for the recipient addresses.

In the Transport tab, enter the MX record that is displayed in O365 for your domain as the smarthost.
You can see the DNS name required for this in the Microsoft 365 domain view::
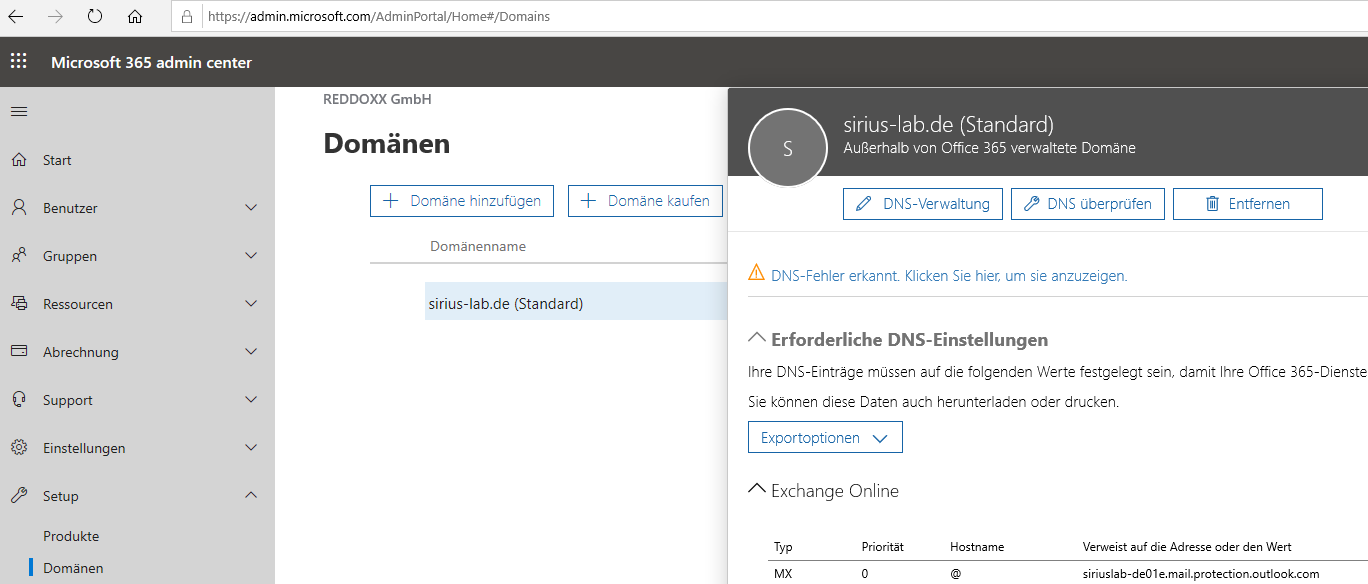

Do net set the checkbox "resolve domain part as hostname".
In the advanced tab, set the FQDN according to your appliance.

If an on-premises Exchange is also available, the transport policies must be adjusted accordingly.
The following procedure is recommended:
The transport policy with the fewest affected email addresses should be at the top of the list.
If there are for example fewer on-premises users than cloud users in the hybrid environment, use the on-premises transport policy with Smarthost to on-premises Exchange as the first policy.
In the first transport policy, the recipient addresses are then listed individually line by line.
In the second transport policy (i.e. the one with the larger number of email addresses/users), the wildcard *@domain.tld is used in the transport policy for the recipient addresses.
In the Local Domains of the appliance, configure the option "Hosted Exchange" for the O365 domains.
Setting Local domains

Also configure DKIM for the Local Domains so that outgoing emails can receive a correct DKIM signature.

This is especially necessary when using the MailSealer.
The local Exchange Server needs to be permitted to be allowed forwarding external E-Mails via the appliance.
This is adjusted via Configuration => Email Transport => Local Networks:

- Log in to the Exchange Admin Center
- Create a new connector (Email Flow => Connectors => Add Connector) and adjust the settings accordingly (the following screenshots serve as an example):


Select the MX of your REDDOXX Appliance here:

Enter the name of the SSL certificate that is used in the REDDOXX Appliance:

Even if the test fails, accept the save with "Yes", as the connector is necessary for the configuration of the transport rule.

- Create a new transport rule (Email Flow => Rules => Add a Rule => Create a New Rule)


If outgoing emails accumulate in the delivery queue of the appliance in this manner, this is due to Exchange Online throttling for the Tenant.
We have no direct influence on this and would like to point out that although the following workaround can circumvent this, it could lead to loops if implemented incorrectly. The cause of the throttling is usually a missing receive connector. However, we have repeatedly observed that when the REDDOXX appliance communicates with other Exchange Online recipients, the E-Mails might be assigned to the own Tenant within Exchange Online and then end up in a loop.
The following solution is proposed:
- The appliance requires a TLS certificate that must not be from LetsEncrypt (explanation to follow later).
- A connector must be created in admin.exchange.microsoft.com FROM your organisation's E-Mail server TO O365, where the authentication method has the subject name of the certificate.
- This TLS certificate must be configured in the incoming transport policy (for E-Mails that need to be delivered to your own Tenant).
- Under no circumstances should the outgoing transport policy on the appliance have this TLS certificate, otherwise there is a risk that E-Mails to other M365 contacts might be collected by your own Tenant and result in a loop.
- Lets Encrypt must not be used as a certificate here, as only the SMTP receiver receives the updated certificate during renewal, while problems can arise with the transport policies (e.g. when saving the order).
- If the outgoing transport policy also requires a certificate (e.g. for mTLS), a different one must be used than in point 3.